This tutorial demonstrates how to build and control a radar for object proximity tracking using Polytech’s SMART:Blox S5 Set and the STEM LAB Windows application.
Method
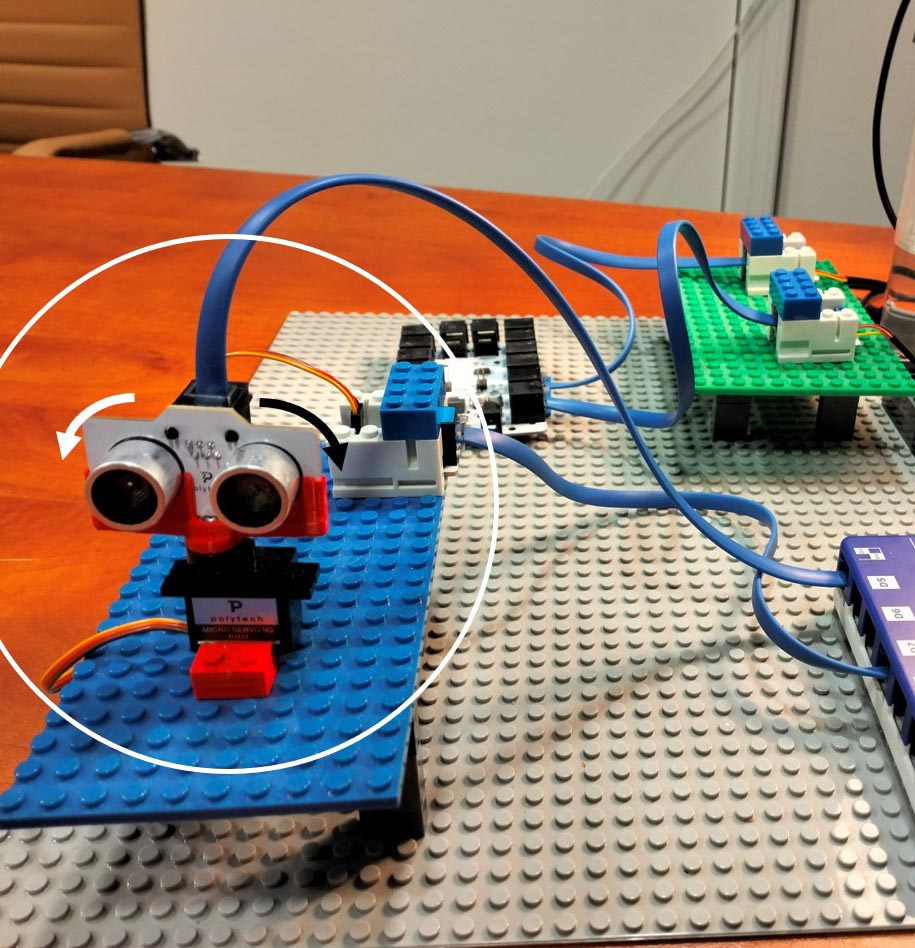
An Ultrasonic Range Detector, mounted on a micro servo mechanism, scans a 180° area to detect obstacles within a 10–50 cm range. Real-time scanning results are displayed on a connected Windows PC.
Contents
Equipment
- Hardware
- SMART:Blox S5 STEM Set
- ARD:icon controller
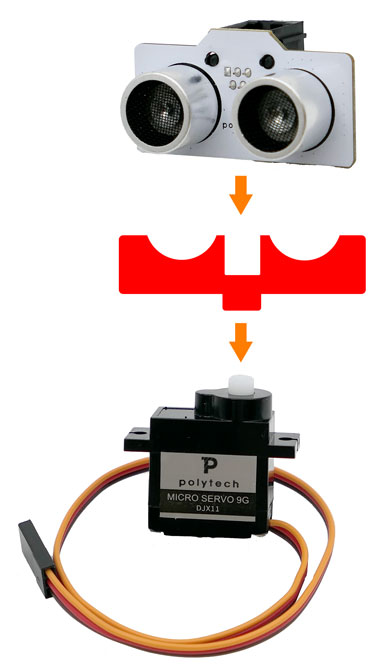
- Ultrasonic Range Detector DJS22
- Micro Servo DJX11
- Servo Controller EXP-AJ11
- EB:blocks (2 white, 1 blue, 1 red ultrasonic range detector servo adaptor)
- Blocks base
- UTP cables (x2)
- SMART:Blox S5 STEM Set
- Software
- Polytech STEM LAB application on a Windows PC

Safety Notes
There are no special safety requirements for this experiment.
How Ultrasonic Sensors Work
The sensor measures distances by emitting sound waves and calculating the time taken for the echo to return. For example, a 20 cm distance requires about 588 microseconds for the sound wave to travel to the object and back.
Set up Instructions
- Encapsulate the Servo Controller EXP-AJ11 using the white and blue EB:blocks.


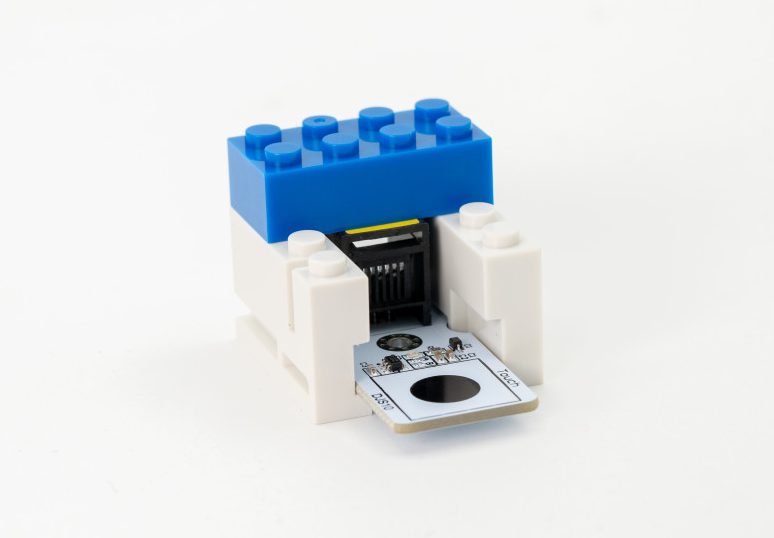
- Attach the Ultrasonic Range Detector to the Micro Servo DJX11 via the red adaptor.
- Secure all components onto the blocks base.
Connections
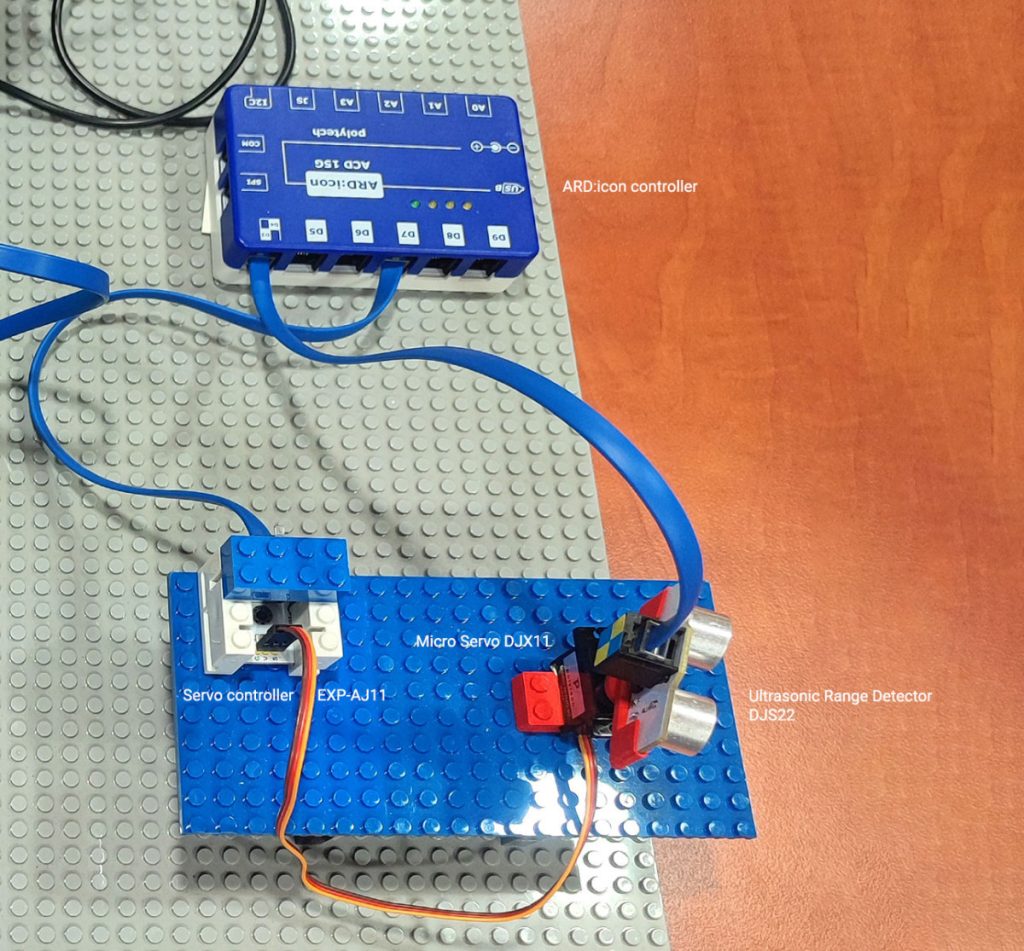
- Connect the Micro Servo DJX11 to the Servo Controller.
- Link the Servo Controller to the ARD:icon D7 Digital Input using a UTP cable.
- Connect the Ultrasonic Range Detector to the ARD:icon D3/D4 Digital Input using another UTP cable.
- Use a USB cable to connect the ARD:icon to the Windows PC.
Usage Instructions
- Launch the Polytech STEM LAB application.
- Select “Arduino Radar” and press “Start Radar.”
- Observe the radar scanning a 180° area and displaying objects within the 10–50 cm range.

Features and Options
- Adjustable Scan Area: Modify the min and max angles of rotation. Use the Value Range slider to narrow down the scannable area by adjusting the min and max angles that the sensor will rotate.
- Scan Direction: Choose between left-to-right or right-to-left scanning. Use the Direction drop down menu to change the direction of the scan:
- Upwards moves the sensor rigth to left from 0 to 180 degrees or
- Downwards moves the sensor left to right from 180 to 0 degrees
End of tutorial