In this experiment we test water retention using Polytech’s S5 STEM Set and ARD:icon block programming.
Method
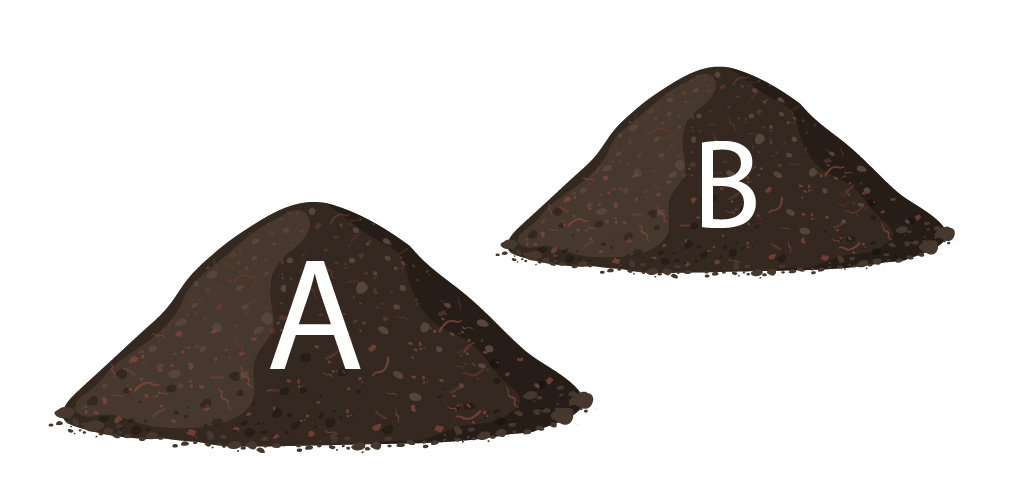
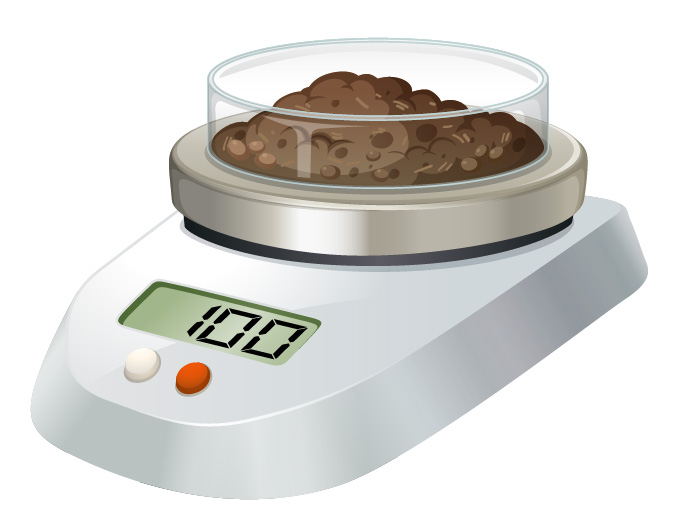
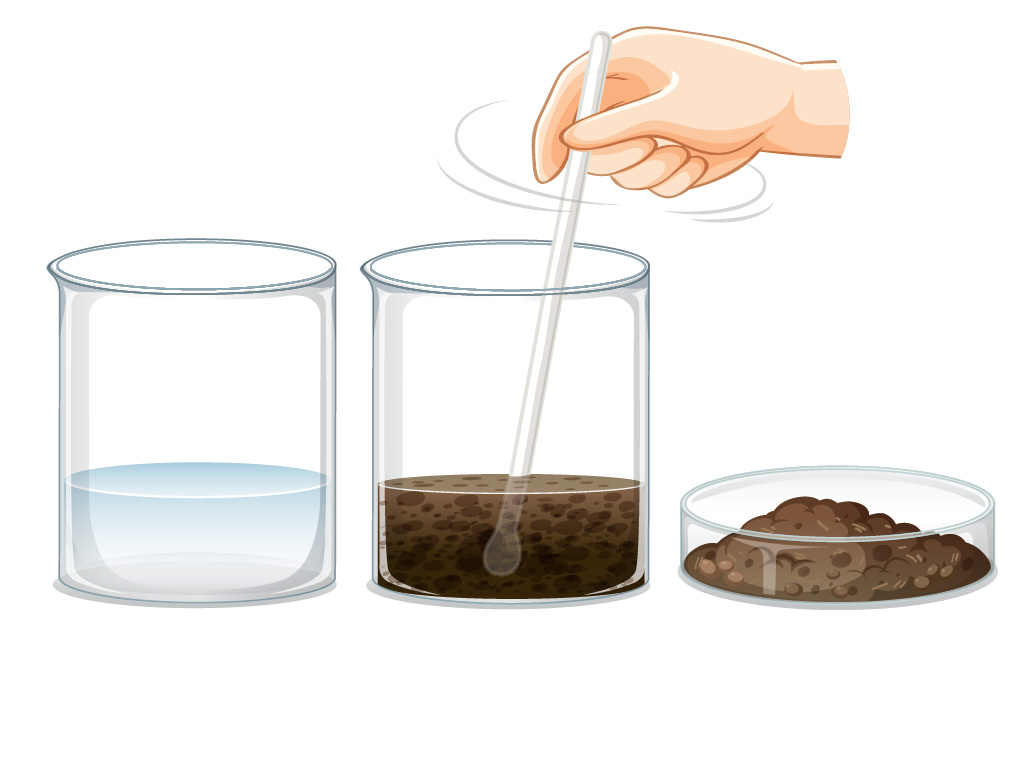
We collect two samples of 100g soil from diffirent depths (e.g. Sample A: 5cm and Sample B: 20 cm) and mix each one separately with 50ml distilled water to create sludge.
For each sample:
- We use the Soil Moisture Sensor AJS05 to measure the moisture level.
- We use a push button to display the humidity sensor reading to an LCD screen.
We examine the results to explore that different soil samples have different properties. Sample A humidity level is less than Samble B as a result of the water retention property of the soil.
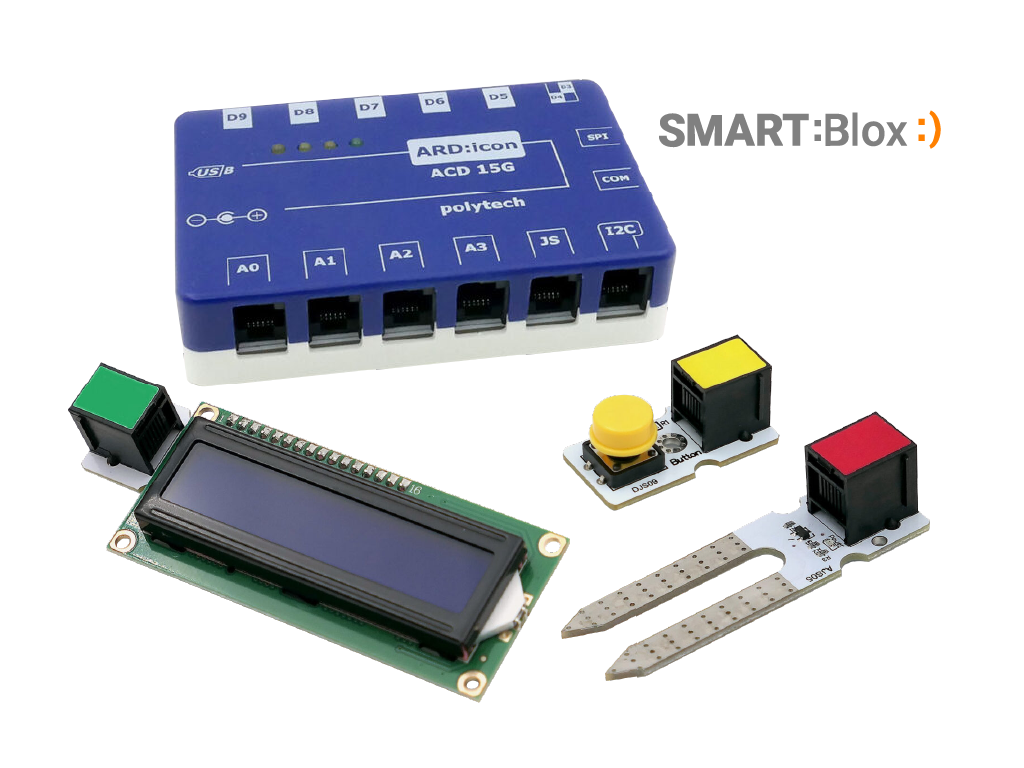
Equipment
- SMART:Blox S5 STEM Set
- ARD:icon controller
- Soil Moisture Sensor AJS05
- Push Button DJS09
- LCD 16×2 AJX04
- UTP cable (x3)
- USB cable (x1)
- Sample discs (x2)
- Scale
Materials
- 50ml Distilled water (x2)
- 100g soil sample from 5cm depth
- 100g soil sample from 20cm depth
Hardware & Software
- Windows PC
- ARD:icon application

Warnings/safety
- There are no special safety requirements for this experiment.
- The soil should be taken from diffirent depth below the surface for each sample.
- The experiment must be conducted in such a way so environmental conditions do not interfere with the moisture levels of the collected samples
1. Sampling
- Collect two samples of soil from the test area. Each sample of soil should be taken from different depth below the surface e.g.
- Sample A from 5cm
- Sample B from 20cm
For Sample A and Sample B:
- Weigh out 1-unit soil (100 g is recommended).
- Add 50 ml distilled water to it.
- Stir the sample for 30 seconds.
- The soil-water sample is homogenized to make sludge.
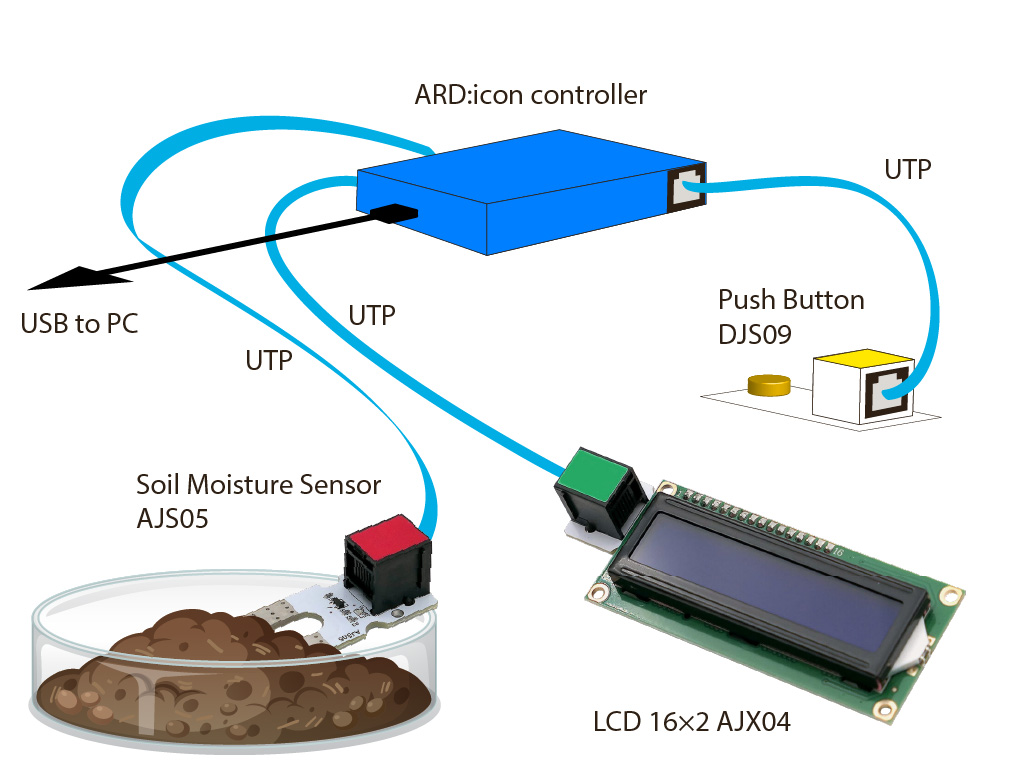
2. Connections
- Connect the Soil Moisture Sensor AJS05 to the ARD:icon A0 port via UTP cable
- Connect the Push Button DJS09 to the ARD:icon D9 port via UTP cable
- Connect the LCD 16×2 AJX04 to the ARD:icon I2C port via UTP cable
- Connect the ARD:icon controller to the PC via USB
3. Block Programming
- Run the ARD:icon application on your PC and create a new programm for the project. The logical steps should be something like that:
- Assign to a variable (e.g. Humidity) the value of the humidity sensor reading.
- Assign to a constant (e.g. Soil_Humidity) the value: “Soil Humidity:”
- Create an IF conditional statement
IF push button is pressed THEN:- print to the first line of the LCD screen the value of the constant Soil_Humidity
- print to the second line of the LCD screen the value of the variable Humidity
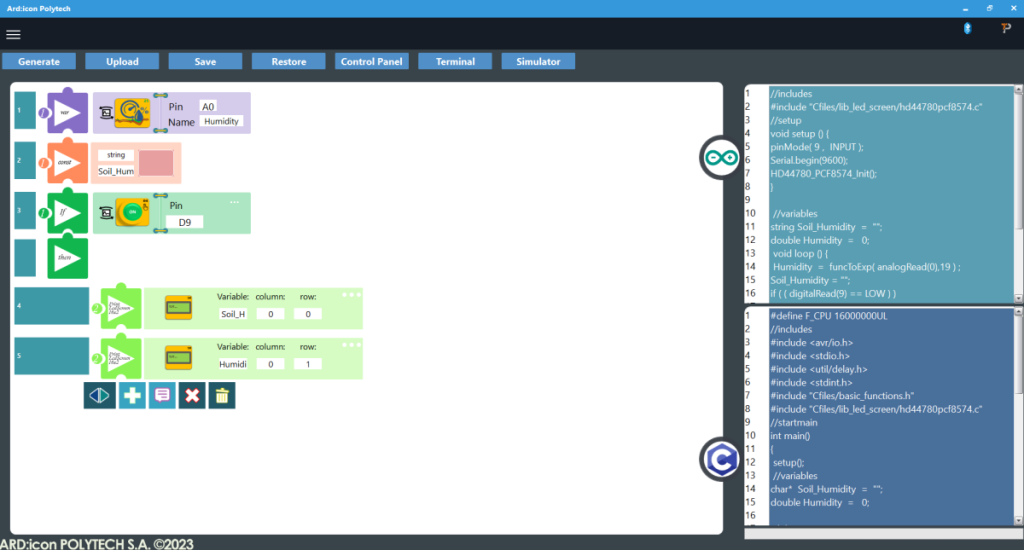
- When done, press Generate to generate the Arduino code
- Press Upload to upload the programm to the ARD:icon controller
4. Usage Instructions
- Insert the Soil Moisture Sensor AJS05 to Sample A, wait 1 minute.
- Push button to display Sample A humidity level on the LCD Screen
- Remove and clean surface of humidity sensor with a dry cloth
- Repeat steps 1-3, for Sample B

End of tutorial